Prepping for Custom Stainless Exhaust and Skid Plate Design
Posted on Apr 01, 2021
We are honored to have a friend of ours, Scott Banes, agree to build us an exhaust. It’s going to be 3” stainless steel with one muffler at the rear and as similar looking to the works cars as possible. Of course, that meant we had to build a skid plate! Well, not exactly but we did need to see how much room we would have around it so we mocked one up.
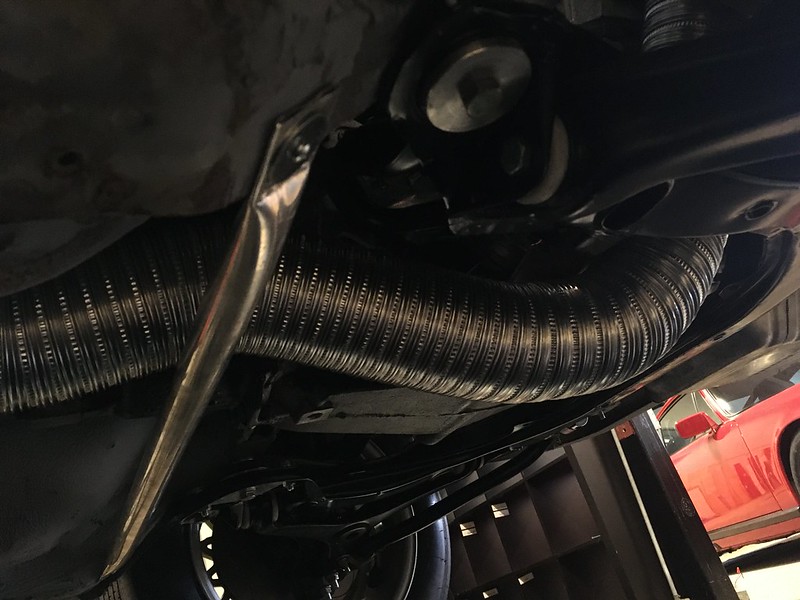
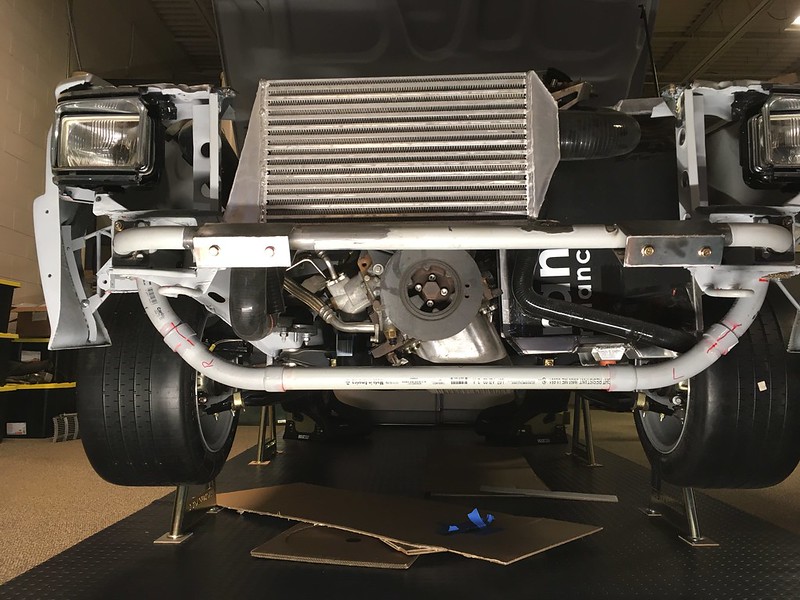
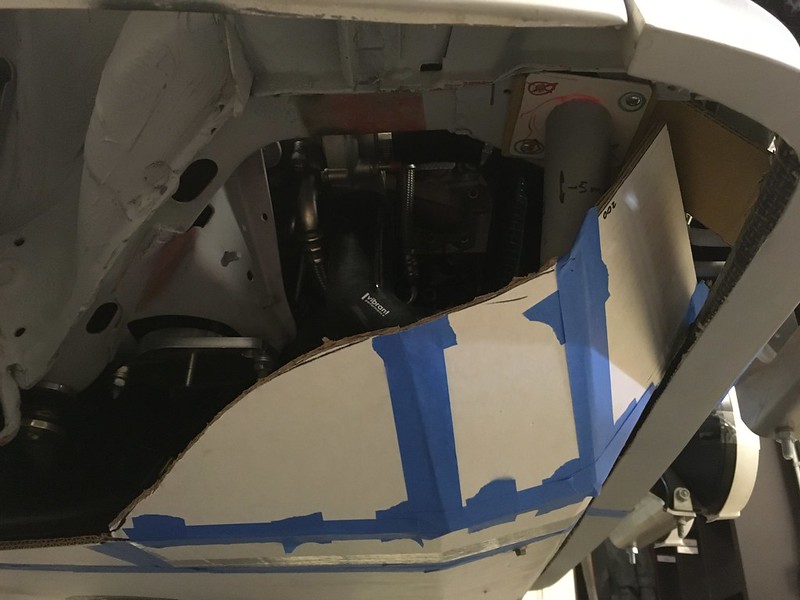
First the rear support bar which spans the chassis rails behind the gearbox. We used some rather flimsy aluminum tube we had lying around which made it really easy to flatten the ends.

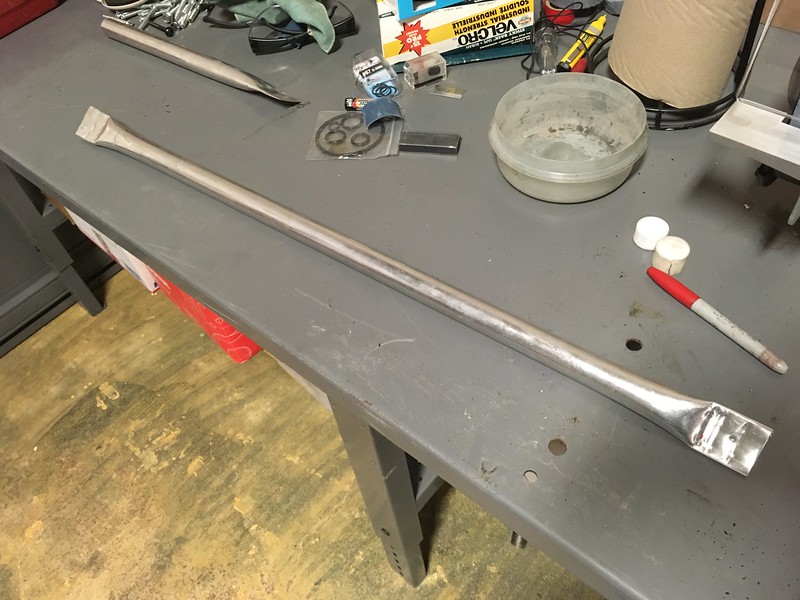
Our surrogate 3” exhaust tubing fit through but it might need to be lower.
Next, we turned our attention to the front support. We thought we would see if we could mock up a reasonable facsimile of the works support using PVC conduit, even though that would be a little larger diameter than the steel tube we’d ultimately be using. How hard could it be?


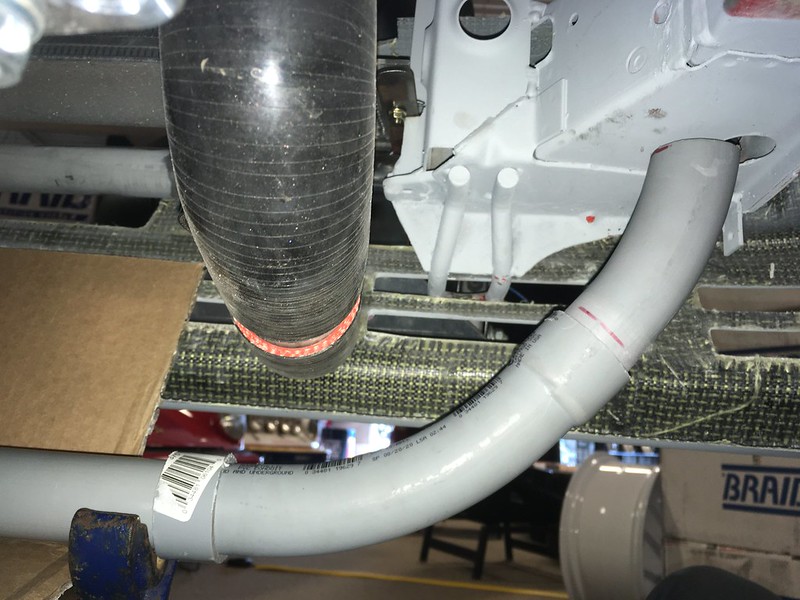
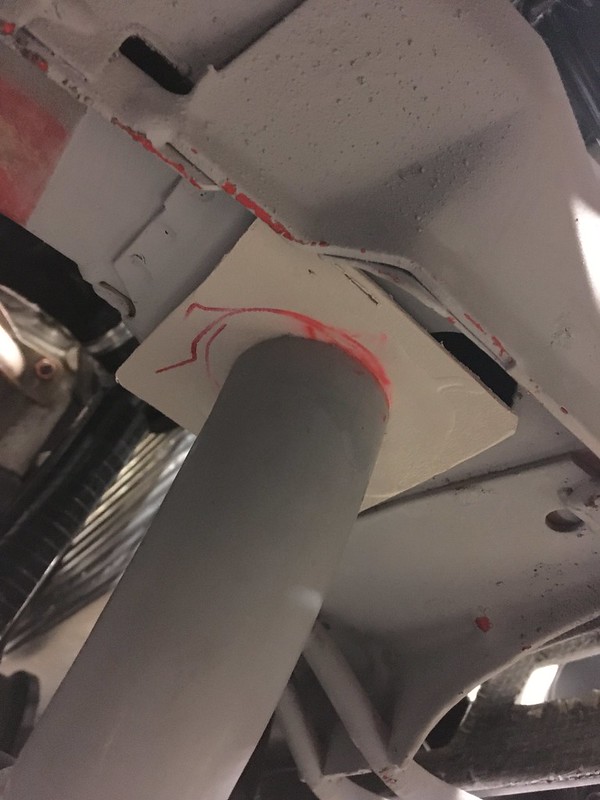

Not bad eh?

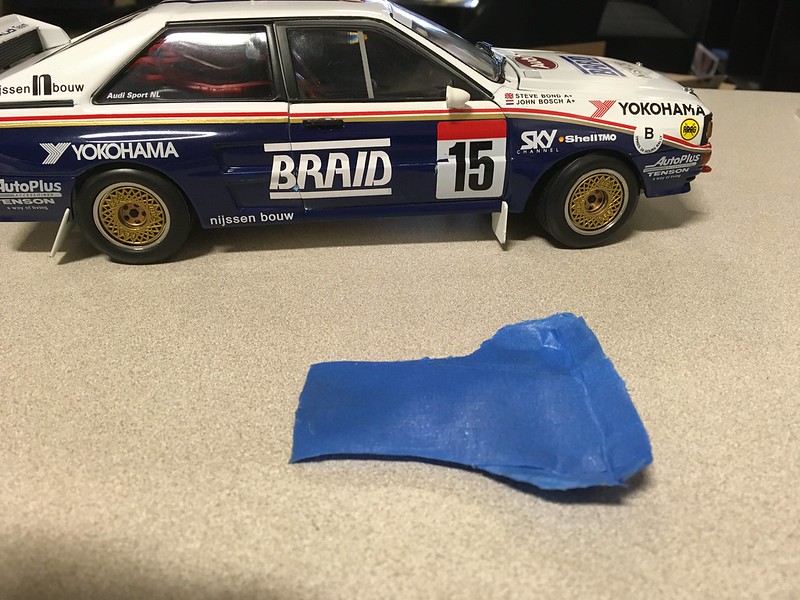
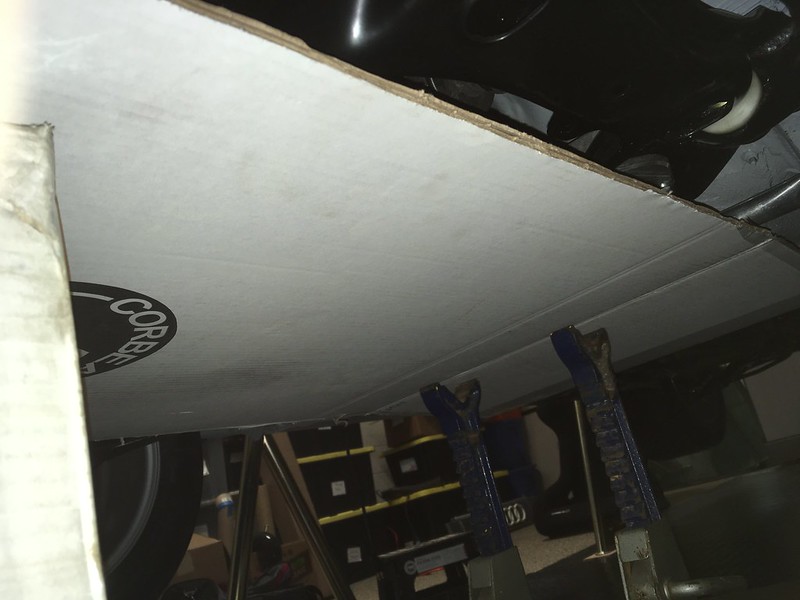
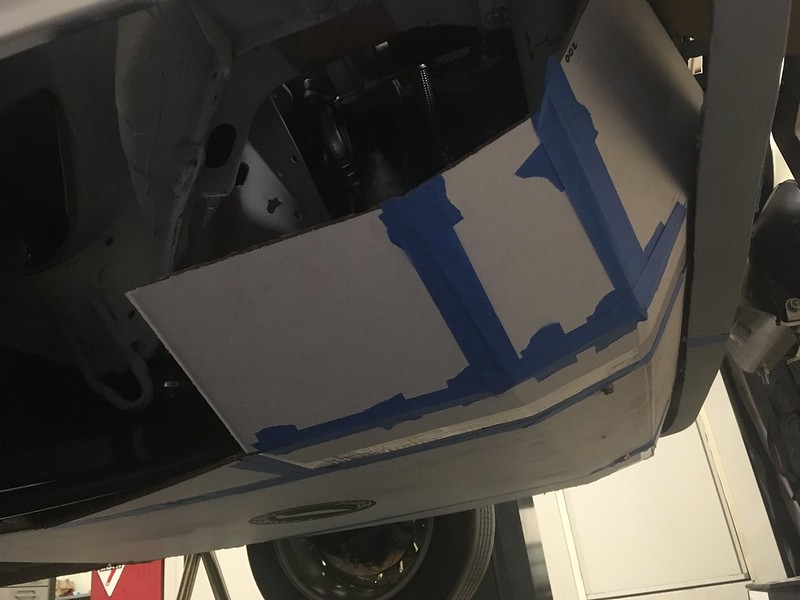
Next, we need an actual plate. Fortunately, we are a Corbeau seats dealer and their seat boxes are perfect for mocking up skid plates. Our plan was to try to replicate the molded Kevlar are whatever exotic material this one was made from, but in aluminum plate. This might be a three or even four Hobnob project!
Well, you don’t know until you try so we put the kettle and our thinking caps on and had a Hobnob. First, we made a masking tape mold off of our 1:18 model. Then we put that on the photocopier and hit x18! (no, we didn’t)
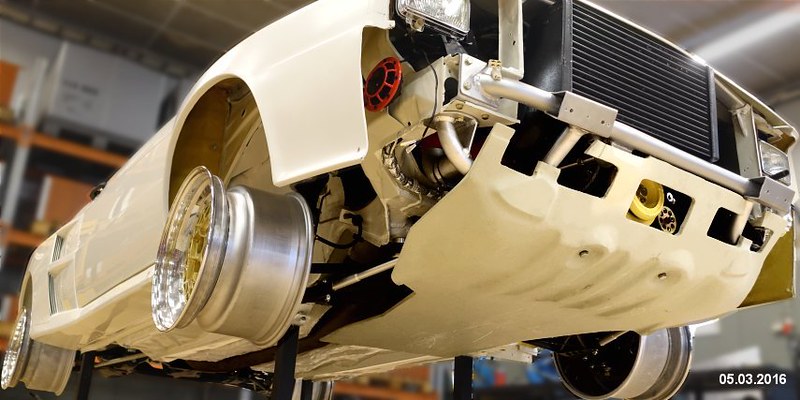
As convoluted as the works plate appears, if you study it carefully you can make out many flat looking facets to it. Most obvious is the center section that is about two feet wide. We realized that if we took a long piece of box this wide and put two bends in it we would have the essential structure down. Moreover, if we weld some 2” wide ribs on it might look quite similar. So that’s the plan.

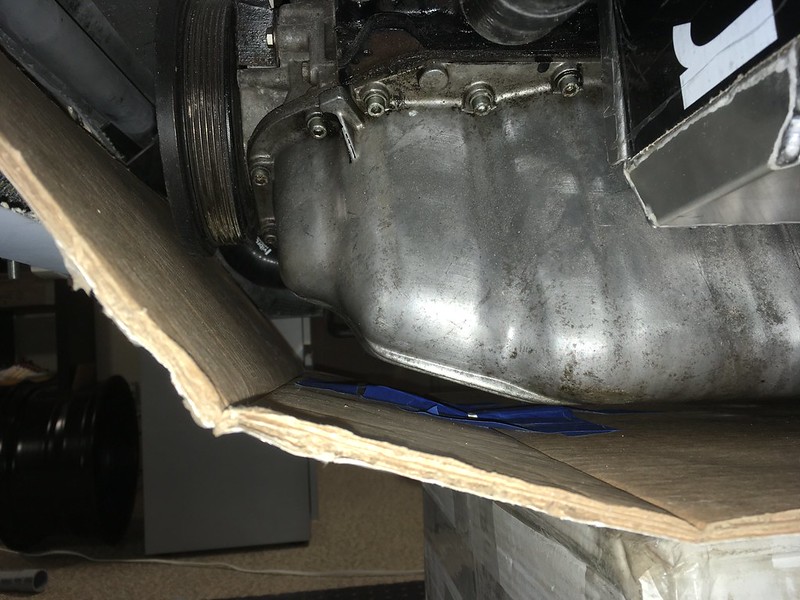
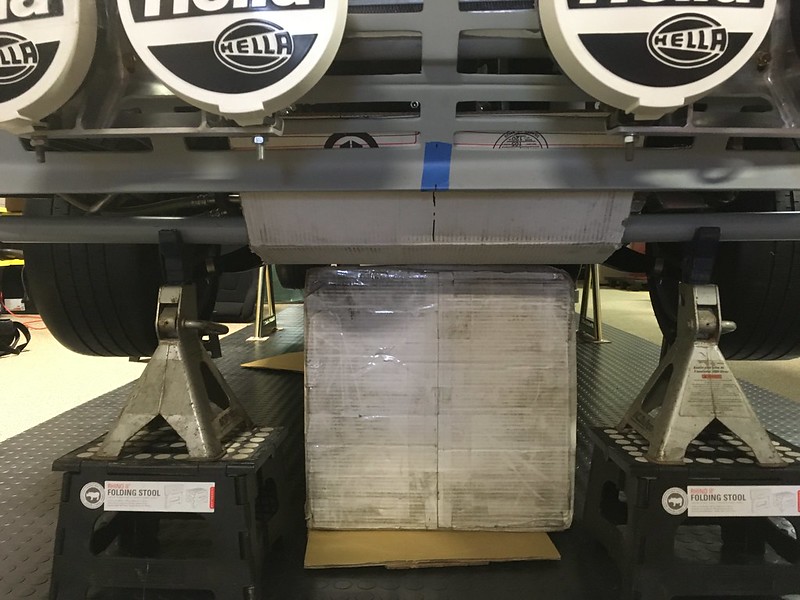
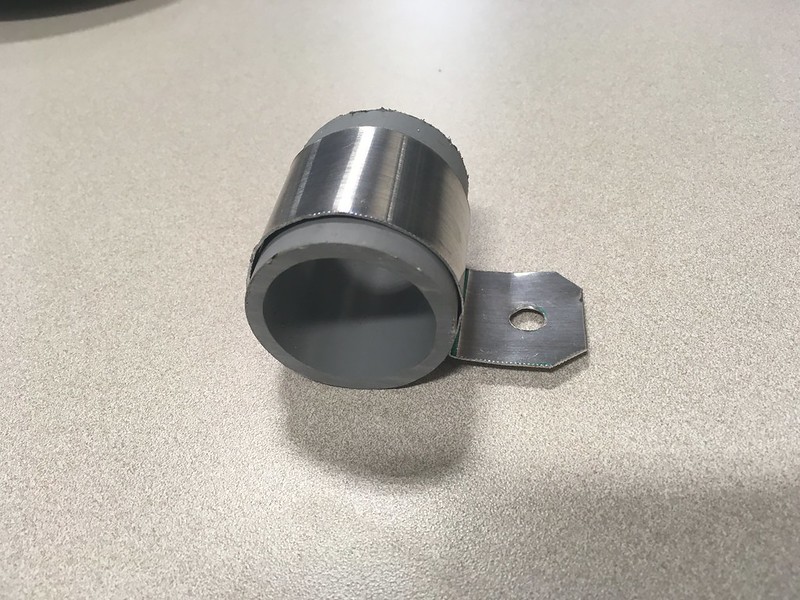
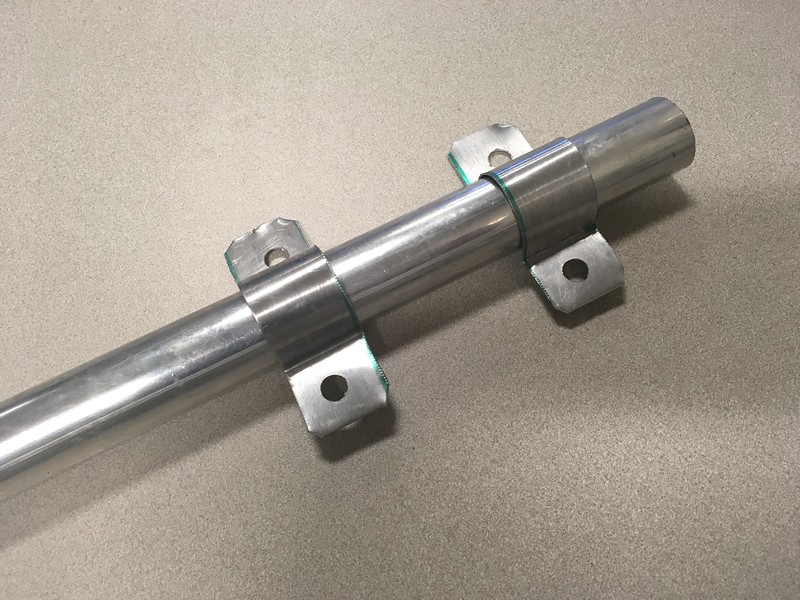
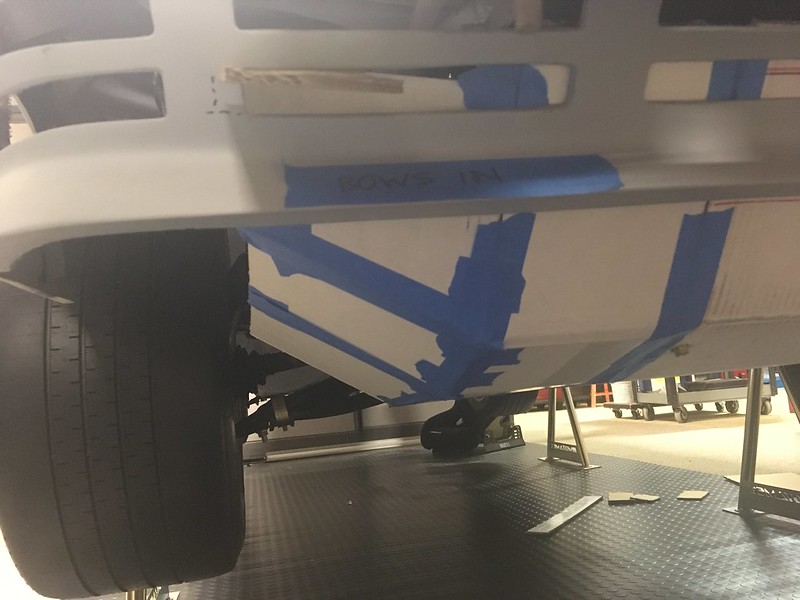
We were pretty happy with this so far and decided that maybe this idea had some legs. We pushed on with mounting the cardboard plate to the PVC support bars so we could remove the box and axle stands. To do this we made some clips out of some thin aluminum sheet and bent them around the bars. They worked rather well unless there’s a slight breeze or somebody sneezes too closely!


So that was the basic structure sorted. Now we just needed to widen it; and form the upturned sides! A bit more Corbeau cardboard and loads of Hobnobs and Yorkshire tea later we had this:
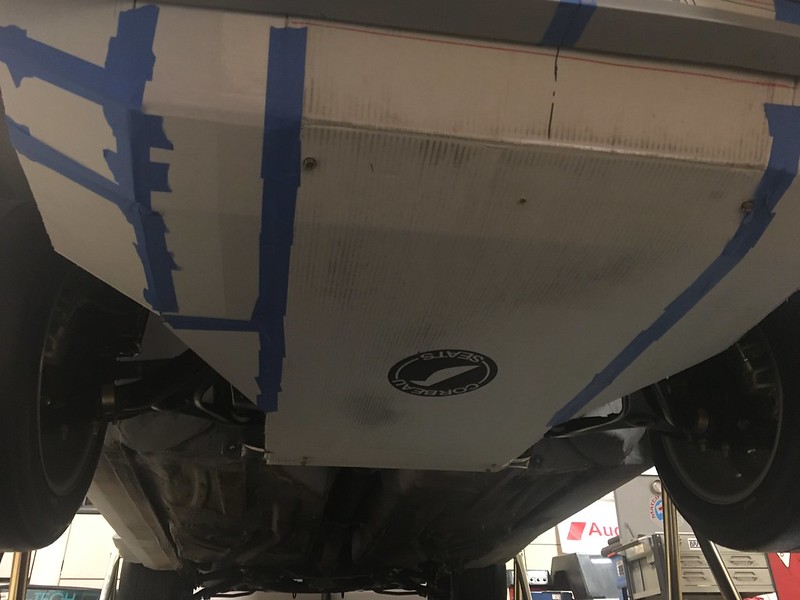
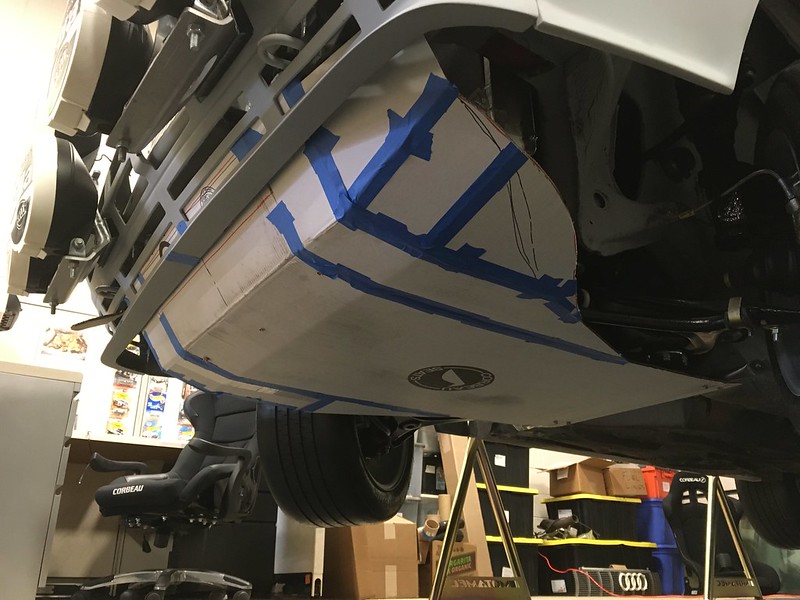

Lovely. Right; what shall we work on next? Mud flaps? First, we’ll have to put the kettle on!
First the rear support bar which spans the chassis rails behind the gearbox. We used some rather flimsy aluminum tube we had lying around which made it really easy to flatten the ends.
Our surrogate 3” exhaust tubing fit through but it might need to be lower.
Next, we turned our attention to the front support. We thought we would see if we could mock up a reasonable facsimile of the works support using PVC conduit, even though that would be a little larger diameter than the steel tube we’d ultimately be using. How hard could it be?
Not bad eh?
Next, we need an actual plate. Fortunately, we are a Corbeau seats dealer and their seat boxes are perfect for mocking up skid plates. Our plan was to try to replicate the molded Kevlar are whatever exotic material this one was made from, but in aluminum plate. This might be a three or even four Hobnob project!
Well, you don’t know until you try so we put the kettle and our thinking caps on and had a Hobnob. First, we made a masking tape mold off of our 1:18 model. Then we put that on the photocopier and hit x18! (no, we didn’t)
As convoluted as the works plate appears, if you study it carefully you can make out many flat looking facets to it. Most obvious is the center section that is about two feet wide. We realized that if we took a long piece of box this wide and put two bends in it we would have the essential structure down. Moreover, if we weld some 2” wide ribs on it might look quite similar. So that’s the plan.
We were pretty happy with this so far and decided that maybe this idea had some legs. We pushed on with mounting the cardboard plate to the PVC support bars so we could remove the box and axle stands. To do this we made some clips out of some thin aluminum sheet and bent them around the bars. They worked rather well unless there’s a slight breeze or somebody sneezes too closely!
So that was the basic structure sorted. Now we just needed to widen it; and form the upturned sides! A bit more Corbeau cardboard and loads of Hobnobs and Yorkshire tea later we had this:
Lovely. Right; what shall we work on next? Mud flaps? First, we’ll have to put the kettle on!
Comments
6 commentsDennis Perpetua
30 Mar 14:34Hello,
I wonder if you received the message I sent a few days ago?
This is Dennis Perpetua from QGP.com,
We’re interested in advertising on your blog. Is this something you’d be willing to discuss?
P.S.: If you don’t want me to contact you again, just let me know.
Dennis Perpetua
Outreach Manager
www.qgp.com
Dennis Perpetua
17 Mar 08:39Hello,
This is Dennis Perpetua from QGP.com,
We’re interested in advertising on your blog,
Is this something you’d be willing to discuss?
P.S.: If you don’t want me to contact you again, just let me know.
Dennis Perpetua
Outreach Manager
www.qgp.com
Dennis Perpetua
7 Jun 11:52Hello,
I wonder if you received the message I sent a few days ago?
My name is Dennis Perpetua and I work for QGP.com .
We’re interested in advertising on your site. Is that something you’d be willing to discuss?
Dennis Perpetua
Outreach Manager
https://www.qgp.com
Silvia Spielvogel
27 May 20:21Hello
Need more content?
We write the content for your website or blog.
We can also syndicate your content for better reach.
Check us out at https://GetArticlesDone.net
Take a look and bookmark us now.
Get your content marketing going.
Best Regards!
Your GAD Support Team
PS: Why? More content means more visitors. We have highly rated US/UK Writers. Original Content. Fast Turnaround. Lowest Pricing.
If you do not wish further communication you can unsubscribe your site at https://unsubscribe.getarticlesdone.net
Dennis Perpetua
2 May 10:14Hello,
My name is Dennis Perpetua and I work for QGP.com,
We’re interested in advertising on your site. Is that something you’d be willing to discuss?
Dennis Perpetua
Outreach Manager
https://www.qgp.com
Dennis Perpetua
14 Apr 21:13Hello,
My name is Dennis Perpetua and I work for QGP.com,
We’re interested in advertising on your site. Is that something you’d be willing to discuss?
Dennis Perpetua
Outreach Manager
https://www.qgp.com